Is it even possible to cure plantar fasciitis in one week? As a Physical Therapist, I hear this question a lot and use it to teach people how the body heals.
In short, your body needs more than one week to completely recover from an injury such as inflammation, tissue repair and remodeling, etc.
But your symptoms are a different story!
Help, I Need Plantar Fasciitis Relief Now!
The good news is that short-term strategies can temporarily relieve the symptoms of plantar fasciitis – with results in as little as one week.
How is this possible? Reduce pain by changing your alignment.
Heel pain is a result of excessive stress placed on the plantar fascia, the band of tissue that spans the bottom of your foot. This band needs internal muscular support to withstand stress. Without that support, you tend to stand with poor foot/ankle alignment, leading to more stress to your plantar fascia – and more pain.
To completely cure your plantar fasciitis, you need to correct your alignment by strengthening and stretching the internal muscles of your foot. However, a cure this way will take anywhere from 4 to 8 weeks.
So if you want to change your foot alignment sooner (in less than a week), you need an accelerated strategy.
Below are four clinical strategies for decreasing heel pain based on research from the Journal of Orthopedic and Sports Physical Therapy. These strategies are particularly effective in reducing the pain you experience while walking (the #1 complaint I hear from plantar fasciitis patients). From my personal experience, using these techniques lessened the sharp heel pain I used to feel – especially in the morning.
How to Get Plantar Fasciitis Relief This Week:
1. Arch Taping
Permanently changing your alignment takes time, but if you want instant relief, try using arch support tape.
The arch of your foot is designed to support each step you take. An unsupportive arch, however, leads to painful asynchrony between the foot and ankle muscles.
By taping your arch, you enable it to better support your foot as it should. But it matters what kind of tape you use and how you apply it. Here are my recommendations:
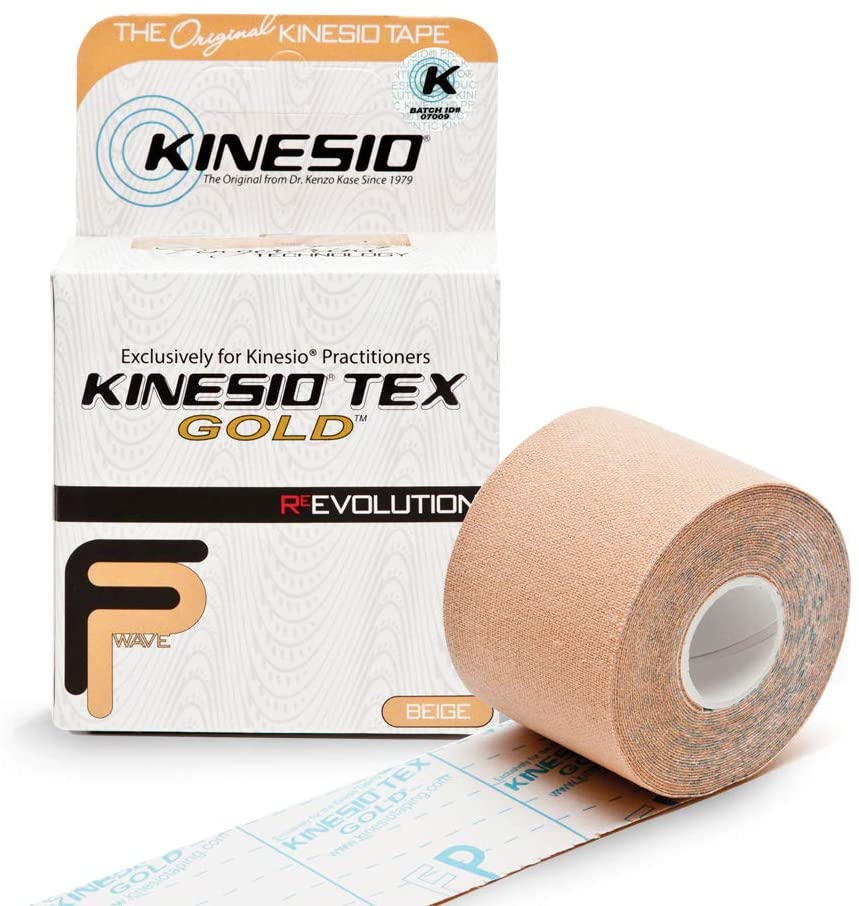
Kinesiology Tape
Kinesiology tape, an elastic therapeutic tape, is very easy to apply and relatively inexpensive. A roll costs about $10-$15 on Amazon and should last a couple of months.
Take a look at the video below on how I apply kinesiology tape for plantar fasciitis. Because it’s so easy to apply, it’s the fastest way to get relief using the taping method.
Leukotape – non-elastic
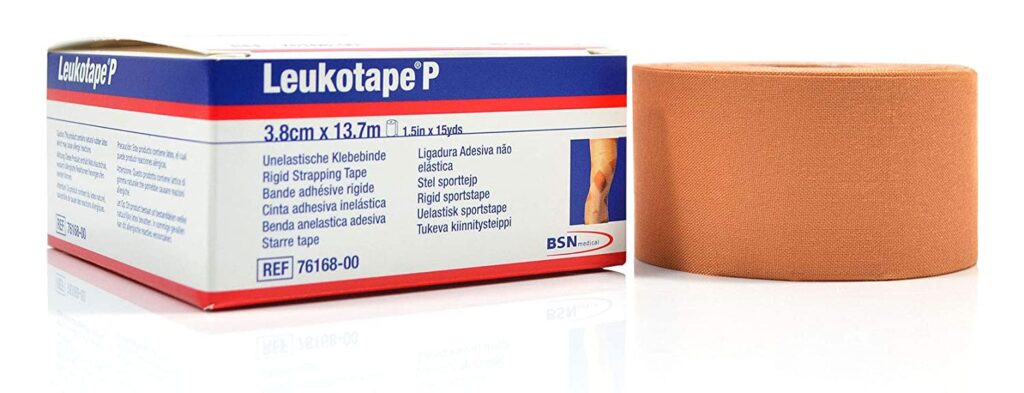
Leukotape is a very strong tape that is useful for supporting the arch on someone who has plantar fasciitis. In more severe cases of plantar fasciitis, it’s my ‘go to’ tape in the clinic. It’s a bit more difficult to apply, but completely possible to do on your own. Below is a picture of the taping method I use with Leukotape. You can try this ‘teardrop’ pattern with regular white athletic tape, but make sure your foot is clean and dry or it won’t stick well.
Leukotape is a very strong, non-elastic tape particularly useful for patients with plantar fasciitis; for severe, clinical cases, it’s my ‘go-to’ tape. Although it’s a bit more difficult to apply, you can definitely do it yourself by following the taping method pictured below.
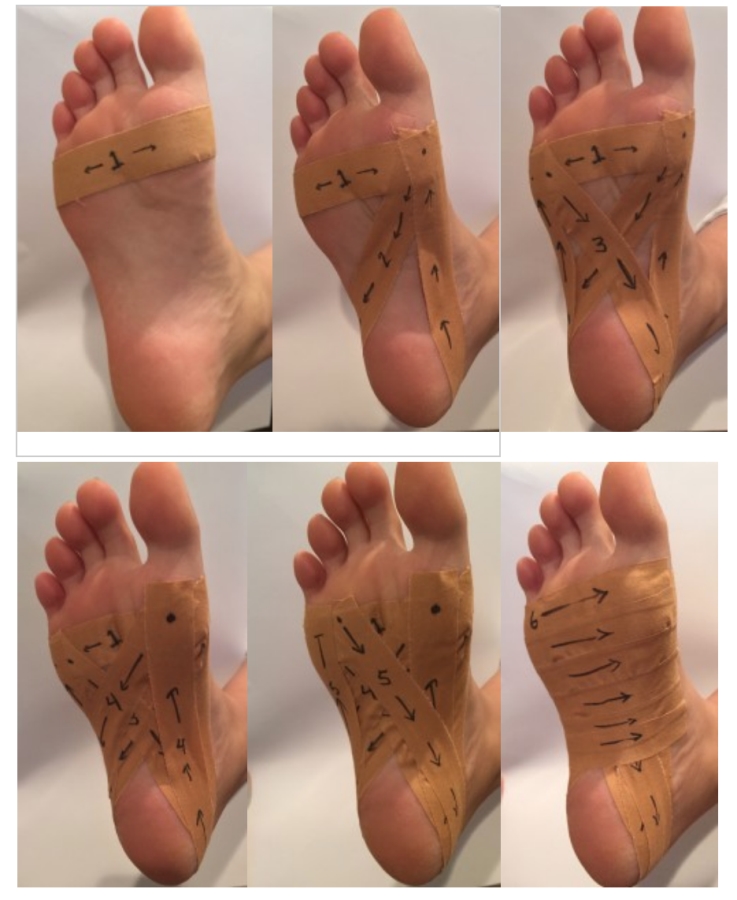
Don’t have either of these tapes on hand, but need relief fast? You can even use regular white athletic tape to make this ‘teardrop’ pattern, so long as your foot is clean and dry – otherwise it might not stick.
2. Wear Plantar Fasciitis Shoe Inserts
In lieu of tape, orthotic shoe inserts provide that much-needed support when plantar fasciitis nips at your heels. Below are my top picks for wearable plantar fasciitis relief – no taping required!
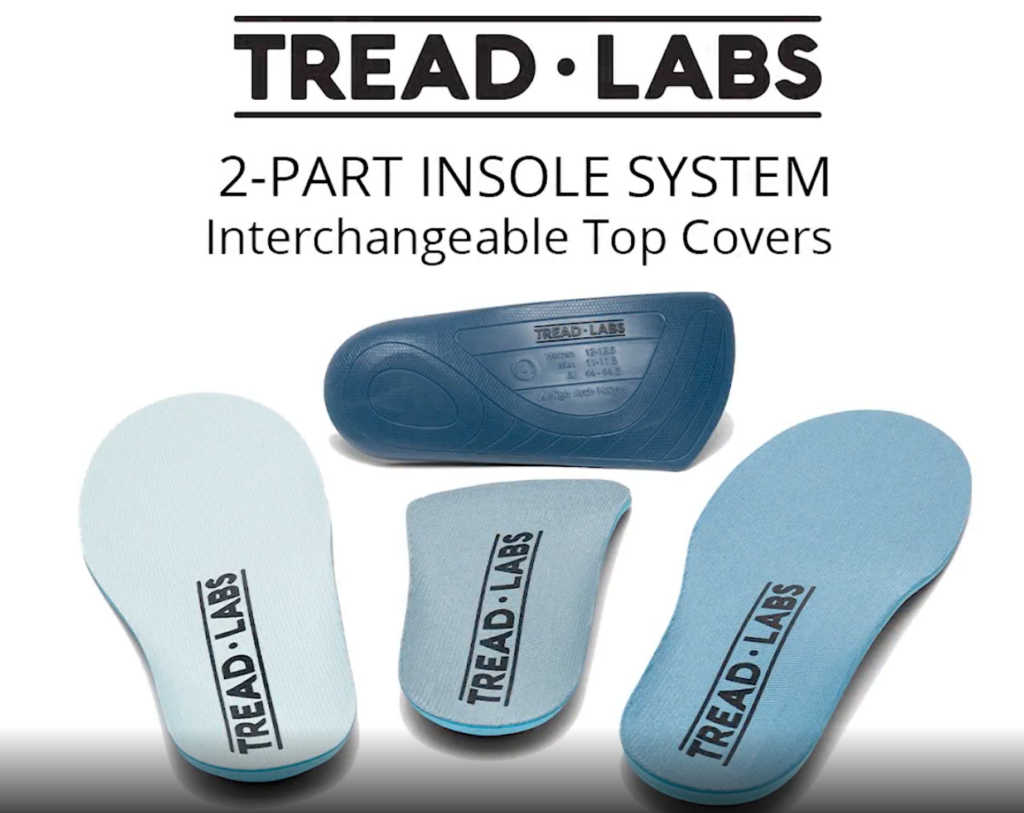
Tread Labs: Plantar Fasciitis Insoles
These are the insoles I personally wear and recommend to my patients. Although they’re more expensive than flimsy inserts from the store, they’re worth every penny, withstanding years and years of wear. More importantly, these insoles will relieve your plantar fasciitis by giving you the alignment you need.
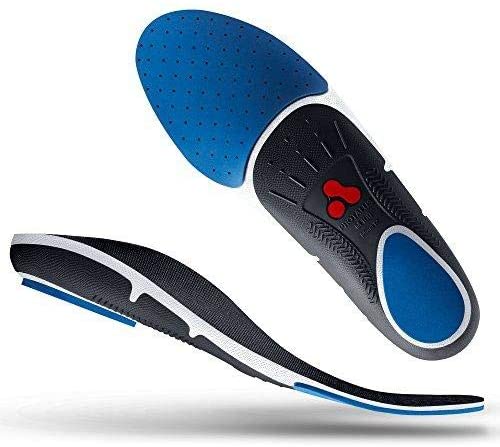
For more reasons to try this insole, check out the Tread Labs insole review I wrote recently.
ProTalus M100
I also recommend these insoles to my patients based on the glowing feedback from actual patients I’ve treated. Again, this insole is not cheap, but the results are worth it.

Powerstep Shoe Insert
For a cheaper option, I recommend the Powerstep insert. At around $25, this quality insole provides effective foot support at an affordable price.
There are a lot of options for shoe inserts; find one that’s right for you. If you need more recommendations, take a look at this article on the best shoe inserts for plantar fasciitis.
Research shows that orthotics and shoe inserts can bring quick relief to plantar fasciitis, but only for 2-4 months at a time. For lasting relief, I recommend combining orthotic therapy with a long-term exercise and stretching program (strategy #4!).
3. Try Compression Socks
Plantar Fasciitis Socks: SB Sox

Popular among athletes, compression garments accelerate muscle recovery by improving blood circulation. This healing concept applies to your plantar fascia as well. Gentle compression will soothe your irritated plantar fascia while supporting your foot with every step.
You can find these socks on Amazon, accompanied by hundreds of positive reviews. From plantar fasciitis to chronic ankle sprains to standing fatigue, all kinds of podiatric aches and pains are ameliorated by compression socks.
4. Calf Stretching
Finally, you can experience quick, temporary relief from plantar fasciitis by stretching your gastrocnemius, or calf muscle.
Why does this help? The gastrocnemius crosses over the ankle and connects to the base of the heel. So if your calf muscle is tight and inelastic, it will pull on the plantar fascia and worsen your heel pain.
Daily calf stretching leads to short-term results and feeds the long-term strategy I teach patients early in their treatment.
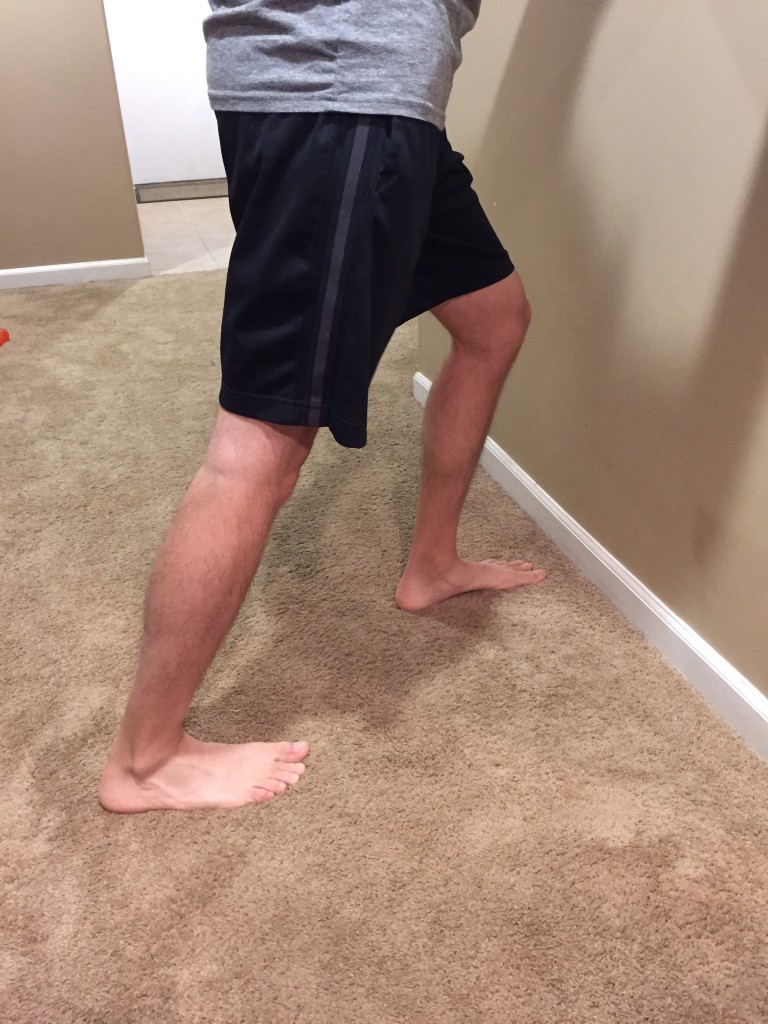
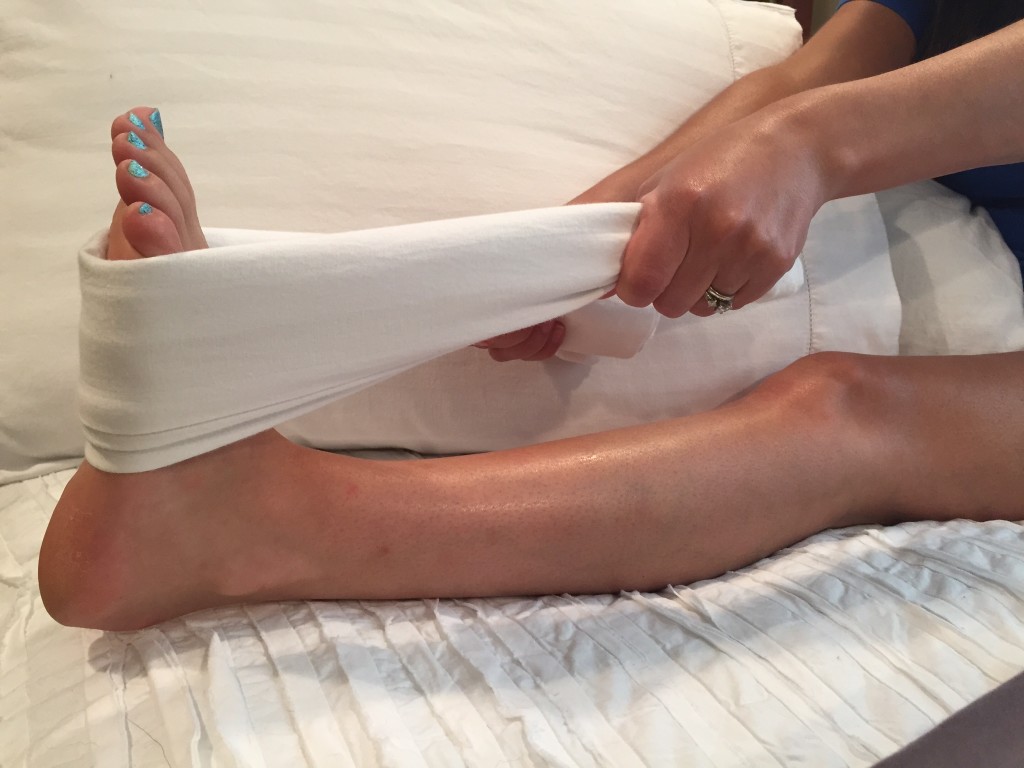
Try these two calf stretches as pictured below:
Facing the wall lunge stretch
In Bed Calf Stretch
Facing the wall lunge stretch
You might have done these before, but were you consistent with them? Consistency is key. Doing these stretches 5-10 times a day will improve the tissue extensibility of your calf muscle. But don’t rush it; stretch for 10-30 seconds at a time.
So Can You Cure Plantar Fasciitis in One Week?
Here’s my verdict: you cannot get rid of plantar fasciitis in just one week. Only a long-term strategy of consistent exercise and stretching can fix the alignment problem at the root of your plantar fasciitis. The good news? These short-term strategies will help you improve your symptoms quickly – and without the use of pharmaceuticals or surgery.
Tread Labs: Plantar Fasciitis Insoles
The absolute best insole that I’ve found for giving your feet better alignment is the Tread Labs Insole.
I personally wear them and recommend them to my patients. Sure, they’re more expensive than the flimsy insoles from the store. But they will last a long time and actually provide relief by giving you the alignment you need.