If you have pain in your thumb when you’re texting, you might have something called…you guessed it…texting thumb. (I know, “golfer’s elbow,” “runner’s knee,” “texting thumb” – we like to keep it simple.)
But before checking yourself in to see a doctor for your texting thumb, you can relieve pain at home using some simple supplies.
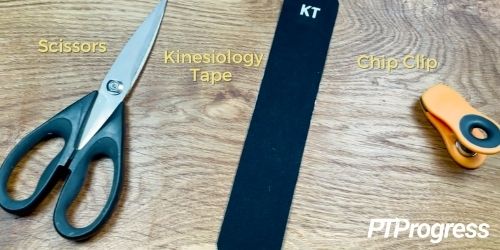
You’ll need the following items:
- Kinesiology tape
- Chip clip
- Scissors
How to Avoid Texting Thumb
Texting thumb is principally caused by two motions: torsion (twisting) and flexion. These motions are especially bothersome to your thumb whenever they’re done constantly and with lots of pressure.
To see how this works, hold your phone in one hand with your thumb over the screen. Whenever you tap on the screen, notice that you have to flex and twist your thumb around to make it flat. By holding this position – for instance, to type or scroll for extended periods of time – you can strain the muscles in the thumb and aggravate an overuse injury.
We do everything on our phones these days, so I know preventing texting thumb feels nearly impossible. But you can reduce the strain on your thumb by changing up the position of your hand, switching hands, or using your forefinger to text (old school!). And when you do text or scroll, watch how much pressure you’re putting against the screen.
Taping Your Texting Thumb
Ok, now that you know how to not make it worse, let’s look at how to treat your texting thumb with kinesiology tape.
1. Cut one strip of kinesiology tape about 8 inches long, or the span of your hand from your thumb to your pinky.
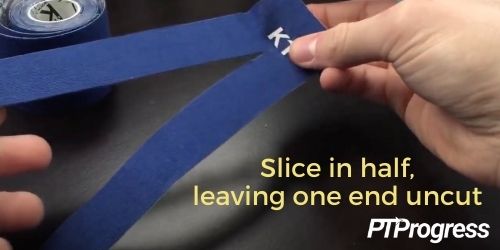
2. Slice the strip nearly in half, leaving just 1 to 2 inches of the strip uncut. This will serve as the base for your thumb support. You should have two long “legs” of tape, connected at the base.
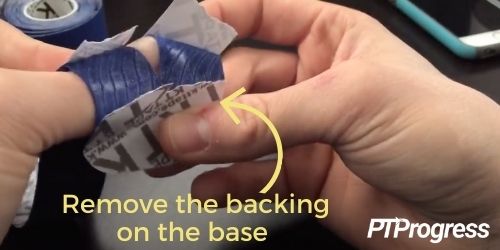
3. Prep the tape by ripping the paper backing behind the two legs and removing the paper from the uncut portion of the tape.
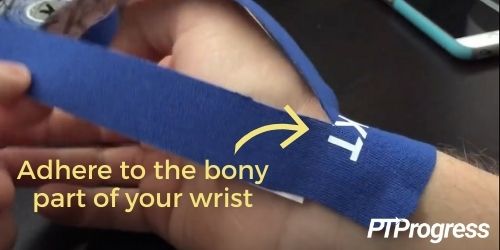
4. Apply the base of the strip over your styloid process, or the bony prominence of your wrist. Be sure it lies flat with no tension.
5. Next, peel back the paper from one of the “legs.”
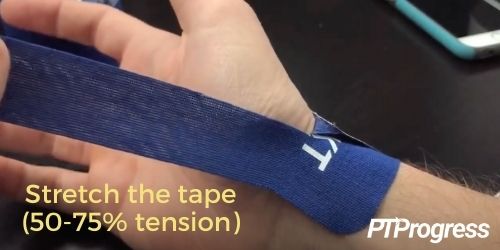
6. This tape is stretchy, and it’s important to have the right amount of tension (50-75%). Stretch the leg completely, and then release some tension as you loop it around your thumb joint.
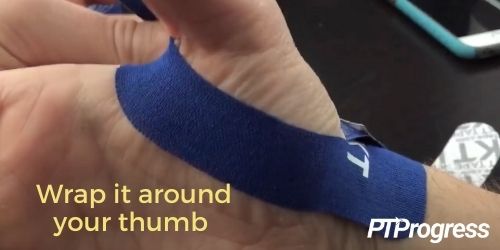
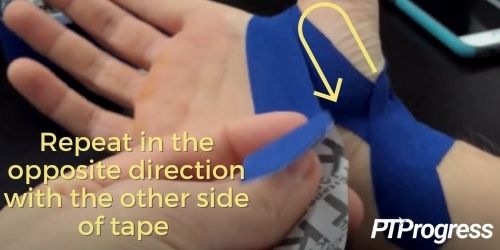
7. Loop the first leg up towards your thumb, around your thumb, then down towards the base starting position.
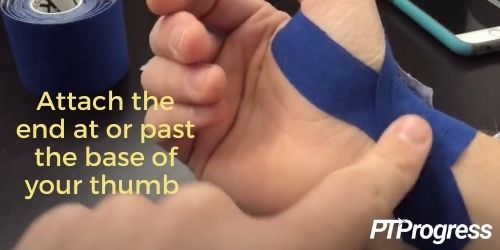
8. Repeat steps 5-7 with the other leg of tape, going around your thumb in the opposite direction. Always make sure you lay the end of the tape down without any tension at all.
Just avoid taping in the crease of your wrist or in the creases of your palm. As you apply the tape, keep your wrist neutral, not bent or flexed in any direction.
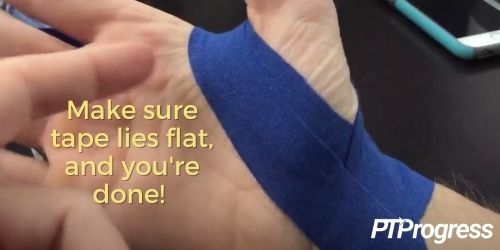
Ta-da! You’ve taped your texting thumb. Most people feel an immediate relief!
Kinesiology tape isn’t a straightjacket; you should still be able to move your thumb around. The difference is that now your thumb has a little bit more support and won’t strain as easily doing the same tasks.
Stretching Your Treatment
I generally recommend wearing kinesiology tape for about 24 hours before carefully removing it. (Key word: carefully! Don’t rip it off like a Band-Aid!)
If, after wearing the kinesiology tape, your skin is red or irritated, give it a day or so before applying the tape again. Some people wear the tape for a couple of days, but ultimately it will wear down on the edges and lose adhesion.
To stretch your supply of tape and make it last longer, wear it up to 48 hours and trim any edges that come loose.
You can also follow up your texting thumb treatment with the easy trick below.
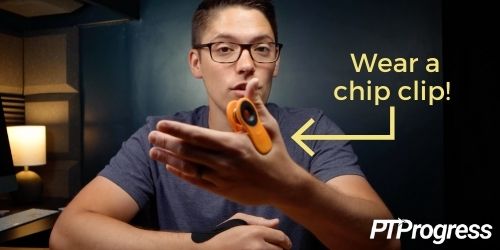
Wear a Chip Clip!
This handy kitchen gadget is amazing for people with thumb pain. All you have to do is clamp the clip onto the webbing in your thumb.
The reason this works is that in your hand’s webbing are about half a dozen muscles that control the movement of the thumb. These muscles can become very tight, especially the Adductor and Opponens muscles which bring your thumb inward and around to reach the screen when you’re texting.
Using a chip clip in the webbing space provides gentle pressure and helps relax the muscles of the thumb. Keep it on for 30 seconds to a few minutes at a time. I recommend storing a clip in a few places, such as at your desk or in your car. Just make sure whatever clip you use has a smooth bottom like this one.
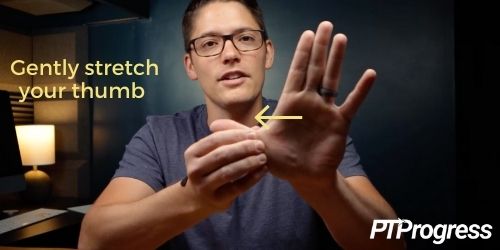
Try to include a chip clip break 3-4 times in your day. After a few minutes, add a manual stretch: gently pull your thumb away from your palm to help lengthen the muscle you relaxed.
Easy Treatments for Texting Thumb
Now you know all about texting thumb! It’s a small problem but a huge bother for those of us who use our phones almost constantly. By taping your thumb, stretching the webbing, and employing a chip clip clamp, you can get quick relief at little cost.