“Stand up straight!” “Stop slouching!” If you’ve heard this all your life, you probably slump in what we call forward head posture.
This forward slouching is easy to spot in photos of yourself or when you catch your reflection in a window. But take a look around – you’re surrounded by hunchbacks. Falling into this posture is effortless, but correcting it takes time and attention. In this article, I’ll show you three exercises to fix forward head posture at home and on the go!
Below are the three easy moves I recommend to my patients to fix forward head posture.
3 Exercises to Fix Forward Head Posture
1. Scapular retraction
When working at a computer, we all feel a strong tendency to reach our arms and head forward to bring us closer to the items in front of us. Staying in this position all day is one of the biggest contributors to forward head posture.
To reverse this tendency, practice scapular retraction – a deliberate motion of pulling the shoulders back.
But before you yank your shoulder blades together like a crazy bird flapping its wings, focus on what you are doing and which muscles you’re engaging. If scapular retraction is performed incorrectly, it could actually worsen the problem.
To perform scapular retraction, slide your shoulder blades so they’re square on your back and squeeze them together, but don’t retract them 100% of the way. The goal here is to engage a natural lift of the shoulders and chest without overextending. If you go too far with this or hike up your shoulders, you’ll inadvertently recruit other muscles such as the upper trapezius muscle in your neck. This muscle is often the culprit behind tension headaches and neck pain.
Once you have this small motion down, you can turn it into an exercise, because retracting only once isn’t going to change anything.
Stand or sit up tall, keeping a gentle bend in your elbows. Exhale as you squeeze your shoulder blades together, then release. Repeat 20 times in a row every hour or so. I recommend setting a timer on your desk to remind you every hour on top of the hour to perform your 20 reps of scapular retraction.
To progress this exercise:
Try combining this movement with some external shoulder rotation. A towel or resistance band, like one of these from Bob and Brad, can help you strengthen your scapular stabilizers and retrain your rounded shoulders.
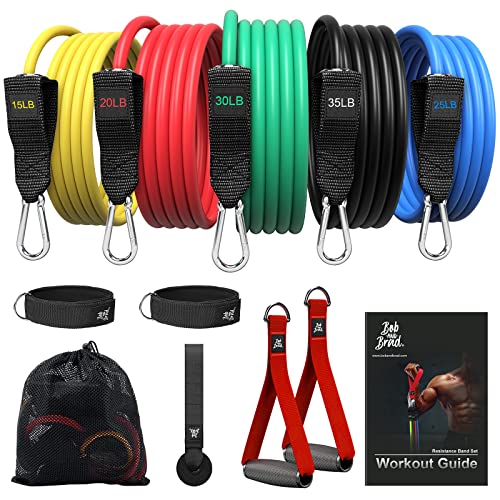
- 125 LBS RESISTANCE VALUE - The resistance bands have 5 colors standing for different resistance levels, yellow (15lb), red (20lb), blue(25lb), green...
- IDEAL EXERCISE BANDS - This resistance bands build muscle, burns fat, increases endurance, and improves flexibility. You can get the same level of...
Stand with your feet shoulder-width apart, holding one end of the resistance band in each hand. Bend your arms, keeping your elbows close to your side, and stretch the band outwards like an accordion. The band should be taut enough to provide progressive resistance as you widen the distance between your hands.
As a strengthening exercise, perform 3 sets of 20 repetitions daily. Remember, none of the movements should feel painful. It’s good to feel a stretch along the chest, but if you feel sharp pains in the neck or shoulder, stop the exercise.
For more support, stand against a wall. You can also use the wall as a guide to keep yourself upright and ensure you perform the movement correctly.
2. Neck Stretch
A neck stretch is another easy movement you can perform anywhere to help fix forward head posture. This one in particular targets a key muscle that becomes tight in forward head position: the sternocleidomastoid (SCM).
To perform the SCM stretch, sit upright and place your right hand on your left collarbone. Slowly tilt your head away from your hand and look up towards the ceiling over your right shoulder until you feel a gentle stretch along the side of your neck. Hold that for 20-30 seconds and repeat 3 to 4 times, alternating sides.
Another group of muscles near the SCM are the scalenes. With neck stretches, you can easily target the anterior, middle, and posterior scalene in addition to the SCM. These movements are very similar, but if you do them right, you can target four different muscles with a very small change.
To stretch your scalenes, stabilize your shoulder by placing your left hand behind your back or sitting on it. Laterally tilt your head, bringing your ear towards your right shoulder. Hold this for 20 to 30 seconds to target the middle scalene. From this position, you can also stretch the anterior scalene and posterior scalene by turning your head to look up or down.
I recommend performing all three directions of this stretch after the initial SCM stretch. They’re so simple, you can easily do them at your desk.
3. Chin Tuck (3 ways)
You may not realize that the chin tuck is a great movement for fixing forward head posture and rounded shoulders. This movement works by strengthening the intrinsic neck muscles that support the head. Without the support of these tiny muscles, the larger neck muscles overpower the head and precipitate forward head posture.
There are three variations to the chin tuck. The first way is performed sitting or standing. While maintaining upright posture, gently bring your chin down towards your chest, giving yourself a double chin. You’ll know you’re doing the chin tuck correctly if you feel a slight pulling along the back of your neck. That’s because not only does this exercise engage the intrinsic neck stabilizer muscles like the longus capitis and longus colli, but it also actively stretches the occipitalis muscle at the base of the skull.
To intensify this stretch:
Use your fingers to apply a gentle pressure at your chin. This will add a light upward pressure along your neck to the base of your skull.
The second way to perform a chin tuck is in supine position by lying on your back and tucking your chin down. Just be careful not to lift your head off the ground as you tuck, because this motion will activate other muscles and could worsen your forward head posture. You can similarly intensify this stretch by adding a gentle pressure to your chin with your fingers.
The third way I like to perform chin tucks is in a quadruped position or on hands and knees. If that’s uncomfortable for you, modify it by placing your hands on a countertop. From here, tuck your chin, holding the stretch at its lowest point before slowly returning your head to neutral. For more of an upper back stretch and thoracic extension, shift your weight backwards and repeat that chin tuck movement.
No matter which version you try, aim for 20 chin tucks. As you repeat the motion, imagine that you’re spinning a rod with your chin.
What is forward head posture?
The medical term for forward head posture is kyphosis. It’s technically a rounding of the thoracic spine, which has a domino effect on your upper posture. To compensate for your spine in kyphosis, your shoulders round and your neck juts forward and upwards.
Sustaining this posture over time results in neck muscle strain, tension headaches, and even back pain from your body’s efforts to counterbalance the weight of your head. The further your head juts out, the more strain your neck and back muscles will undergo.
Despite how bad it is for your posture, kyphosis is easy to fall into. For many of us, rounded shoulders and a forward head posture are occupational hazards, the result of leaning into a computer or phone all day.
But the good news is that you can reverse this forward head posture by both stretching the muscles that are strained and strengthening the muscles that support upright posture.
Bonus: Best Trick to Fix Forward Head Posture
The most practical way to fix forward head posture is to reinforce upright posture in every setting. We hunch not only when we’re at our desks, but all the time – at home, at the dinner table, and even in the car.
When driving, you probably slouch and jut your head forward without even realizing it. You can combat this by sitting up tall as soon as you get in the car. Then, before you start driving, adjust your mirrors for this upright height. Each time you glance in your mirrors while driving, you’ll remember to sit up tall – otherwise you won’t be able to use your mirrors! Strategically positioning your mirrors like this will force you to keep an upright posture while driving.
You can work this trick into other aspects of your day as well. Make sure your workstation enforces a tall and upright posture by using an adjustable desk and an ergonomic office chair. Instead of bringing your head down towards your phone or laptop, make it a habit throughout the day to bring these items up closer to your head.
Changing these slumping habits takes time, but it’s one of the best ways to reduce neck and back pain and promote better posture. Along with the three exercises I outlined above, you have everything you need to fix forward head posture and rise above your hunchback habits!